
We all know regularly use MS Outlook always grow up size of
PST file. To manage and speed up MS outlook you have need to archive outlook
PST file. When you need to create backup of Outlook PST which data is important
but rarely use then you will need to move mail in archive PST file. In Archive
PST files you will move all Outlook items like emails, contacts, task, calendar
and etc.
It is a compulsory work to manage and reduce Main Outlook
PST file. With the help of this features you will easily divide massages in
different PST files which is easily manage and usable.
Advantages of Archive Features of MS Outlook
Archive
feature of MS Outlook provides many benefits of Outlook users like:
- Free of Cost.
- Execution could be scheduled.
- Customization facility to archive Outlook data.
- Maintain Folder hierarchy after archiving PST file.
- Archive all Outlook data like emails, task, contacts, calendars, notes and etc.
How to Use Archive Option and Keep Mailbox Size Small?
MS Outlook provides two options for archiving Outlook PST
data 1st is manually and
2nd is AutoArchive. By
the using of manually option users create archive PST files of specific data
with older then a specific date and in the auto archiving it create
automatically at the specific time which set by Outlook users.
Manually
Steps for Archiving PST file: With the help of few easy steps you
will easily and manually archive Outlook data.
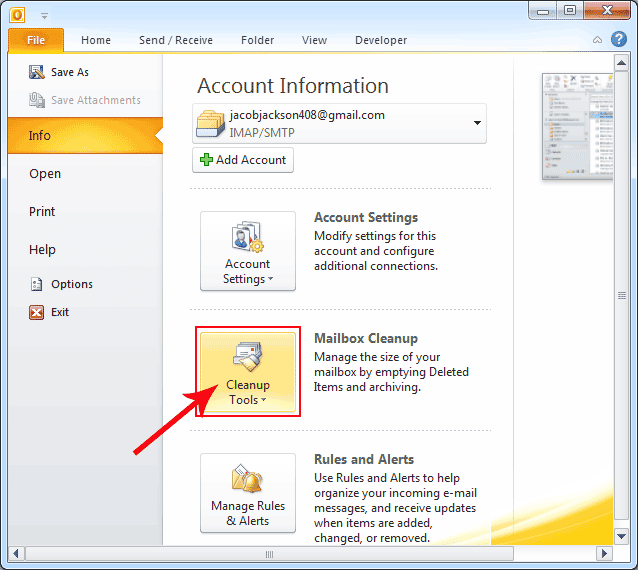
Step 1:-
Click on “File” tab

Step
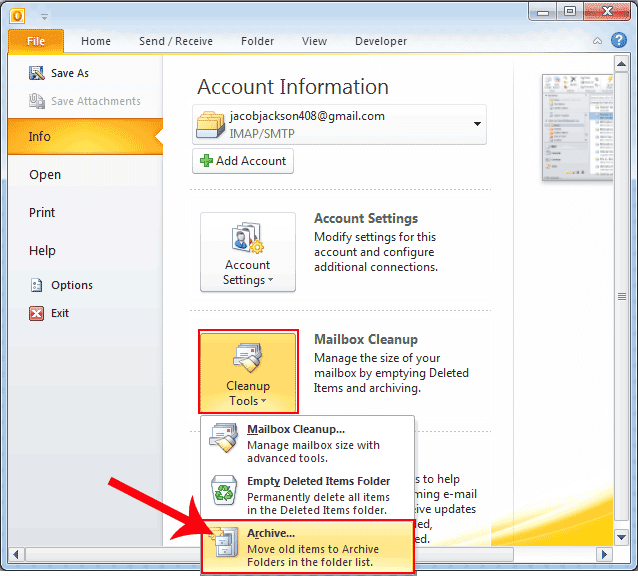
2:- Click On the “Cleanup Tools” option
After that click on “Archive” option to archive MS Outlook
data file.
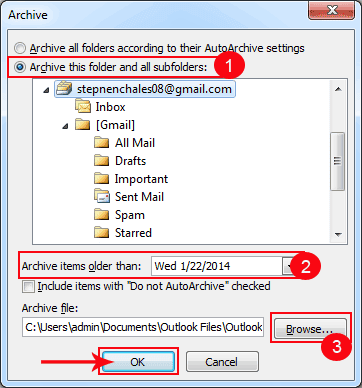
Step
3:-After Clicking the "Archive" Option this screen is open and
here users need to select the option of "Archive this Folders and all Sub folders" after that select the date to archive items older than and select the location
to save archive PST file. After that click on “OK” button to start archiving PST files.
What
is AutoArchive Features of Outlook?
AutoArchiving:
- you will easily move old outlook data with the AutoArchive
features. This Auto Archive Option works in two steps 1st is Turn On Auto Archive option and 2nd
is Set the Auto Archiving properties of
each Outlook folders.
How
to Turn On Auto Archive Option?
With the help of few easy steps you will easily turn on AutoArchive
features in MS Outlook.
Steps to turn on Auto archive option in MS Outlook 2013/2010
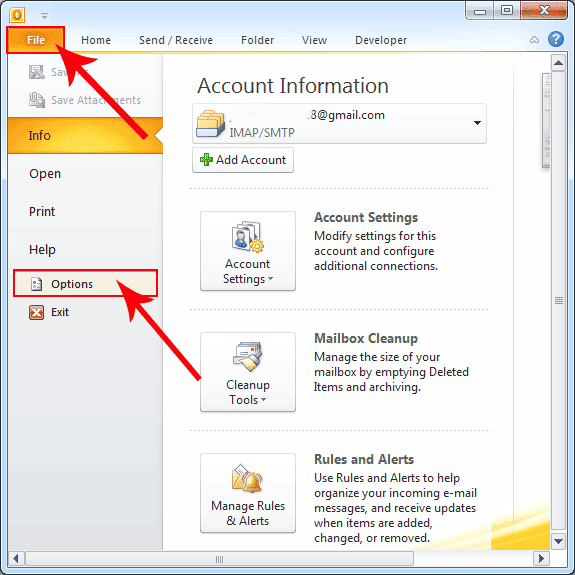
Step 1:- Select
the “File” Tab and after that click
on the “Options” tab
Steps2:- Now select the “Advanced” Option and after that click on “AutoArchive Settings”.
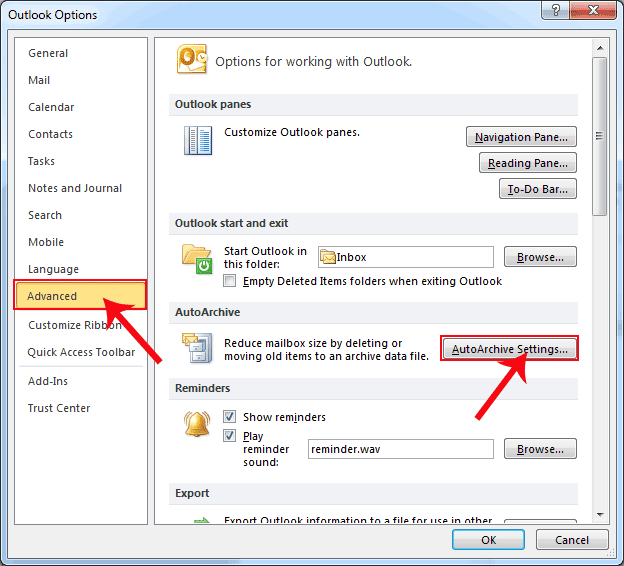
Step 3:-Select
the Check box of “Run AutoArchive Every”
option and select the days after that you will frequently runs auto archive
option. If you want to get notification of run AutoArchive features then check the
option of “Prompt before AutoArchive Runs”.
Now click on “Browse” button to
select the location to save archive PST file. After that you will double click
on “Ok” button to start AutoArchive
process.

How
to Set the AutoArchive Properties For Specific Folder?
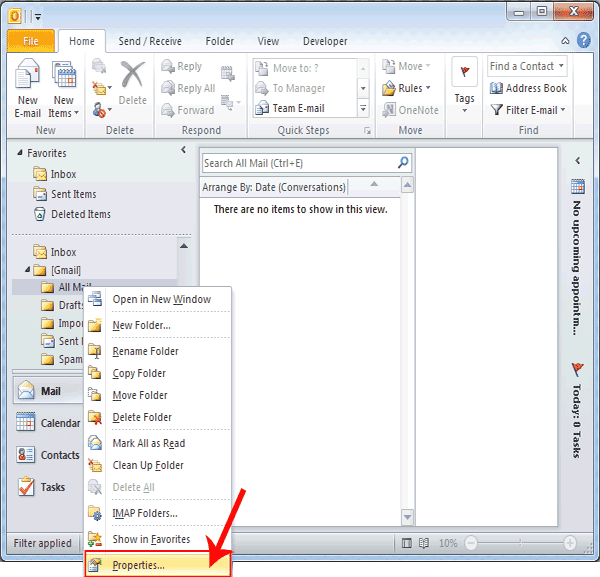
Step:-1
Right click on the folder which you want to archived and selects
the “Properties” option.
Step 2:-
Select the “AutoArchive” properties
tab and to change the AutoArchive settings then you will need to check the “Archive this folder using these settings” after
that manage the Auto Archive properties of the specific folder like that time
of move older data, move to old data location and permanently delete old items.
After that click on “OK” button to save
changes.

No comments :
Post a Comment